Negative Stock Adjustment Process
Method 1: Manual Stock Adjustment
Step 1: Create a New Stock Adjustment Document.
- Navigation Path >
Parts → Inventory → Adjustment → Stock Adjustment.
- Open the system and navigate to the Stock Adjustment section.
- Click the New button to create a new Stock Adjustment document.
Note: A Stock Adjustment Requisition document is not mandatory.
Step 2: Enter Document Details
- Branch - Select the appropriate branch where the stock adjustment is to be made.
- Adjusted By - Enter the Employee Code of the user performing the adjustment.
Step 3: Enter Part Details
In the Part Details section:
- Select the required Part Code from the drop-down list.
- Enter a valid Location.
- Use the Stock Position As-On Report to verify the available stock and location before performing a negative adjustment.
- Enter the Negative Quantity to reduce stock.
- Cost and MRP will be populated automatically after entering the negative quantity.
- Enter appropriate Remarks, if required.
Step 4: Verify Error Log and Save
- Review the Error Log, if any validation messages are displayed.
- Correct the errors as required.
- Save the document successfully.
Method 2: Bulk Negative Adjustment Using Excel Import Utility.
Step 1: Download the Excel Template.
- Download the format for Excel Import Utility.
- Download the prescribed Excel format/template.
Step 2: Get Data.
- Download stock details from the Stock Position As-On Report.

Data Entry Guidelines
- Enter all Part Code in Text Format.
- Enter quantities with a minus (-) sign for negative adjustments.
- Do not enter Cost and MRP values. These fields are automatically populated by the system.
- Supplier Invoice Number & Supplier Invoice Date is Not Mandatory.
Step 3: Import the Excel File
- Upload the completed Excel file.
- Click Get Part Details.
Step 4: Verify & Save.
- Verify the imported data.
- Save the document.
Important Notes :
Prior to performing stock nullification through stock adjustment, all the following pre-requisites must be completed and verified:
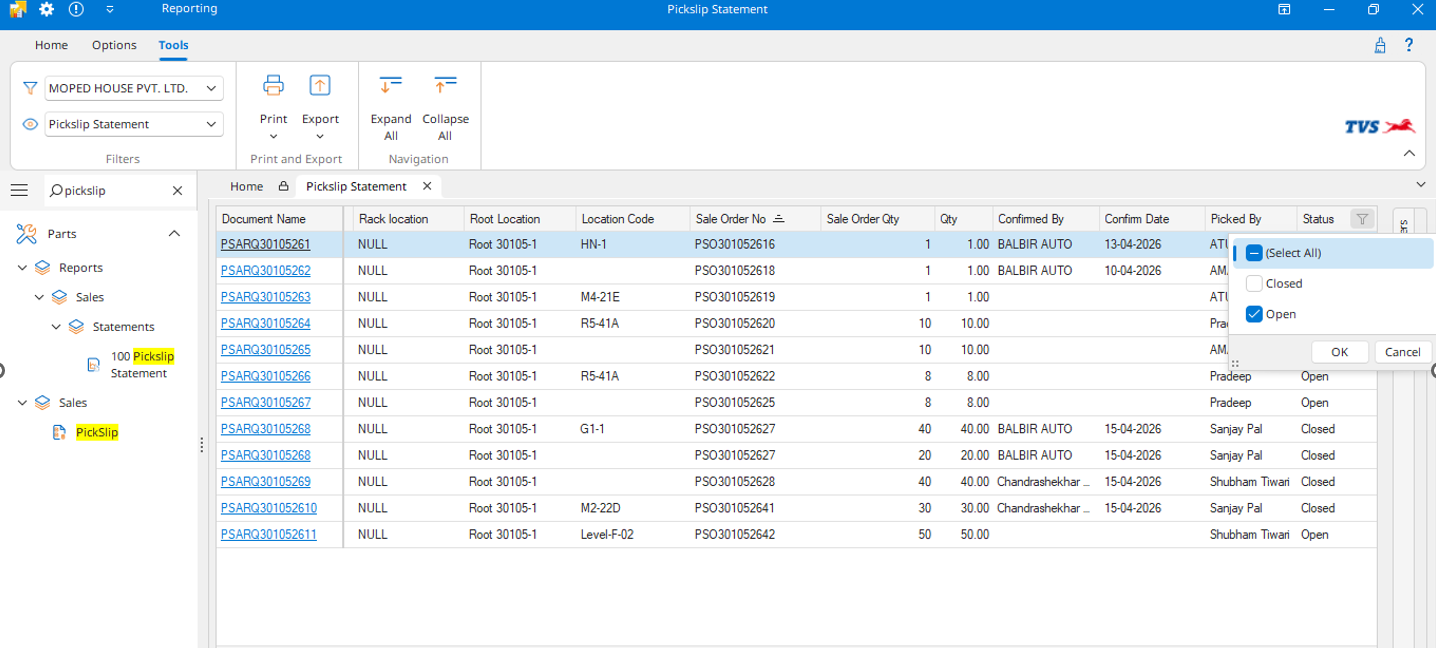
1.1 Pickslips
- All Pickslips must be closed.
- Open Pickslips older than 3 months should be identified and closed.
Steps:
- Navigate to:
Parts → Sales → Pickslip Statement - Apply the required filters.
- Generate the report.
- Identify Pickslips with Open Status.
Close all open Pickslips.
1.2 Sales Orders
- All Sales Orders must be either:
- Delivered, or
- Cancelled
No pending Sales Orders should exist before Negative stock adjustment.
1.3 Shortage/Damage/ Excess Claims
- All Shortage / Damage & Excess quantity must be closed.
- Claims should be approved and finalized by TVS Warehouse before proceeding.
SOP available in Knowledge base -
Shortage Claim - https://tvshelpdesk.excellonsoft.com/portal/en/kb/articles/purchase-claim-reconciliation
DCR (Dealer Claim Requests) - https://tvshelpdesk.excellonsoft.com/portal/en/kb/articles/dcr-dealer-claim-requests
Excess Stock Reconciliation - https://tvshelpdesk.excellonsoft.com/portal/en/kb/articles/excess-stock-reconciliation-esr
1.4 Picklists
All Picklists must be completed before stock nullification.
Open Picklists should be processed by either:
Option A: Create Sales Invoice - Generate the corresponding Sales Invoice against the Picklist.
Option B: Cancel Picklist - Cancel the Picklist if it is no longer required.
Verification:
- Open the Picklist Statement Report.
- Apply the Open Status filter.
- Verify that no Picklists remain in Open status.
- After completing the negative stock adjustment, verify the available quantity using the Stock Position As on Report.
- Ensure that all stock adjustments are accurately reflected to prevent inventory discrepancies.
- The hyperlink for opening a Stock Adjustment document will no longer be available. Users must review adjustment details through the Stock Adjustment Statement Report.
 Validation Checks and Warnings :
1. Quantity Exceeds Available Stock
If the adjustment quantity entered is greater than the available stock, the stock position report will display a negative quantity balance.
2. Invalid Location
If an incorrect or unavailable location is entered in the Excel sheet, the system will display the following validation message:
"Selected Location is Not Applicable."
3. Invalid Part Number
If an incorrect Part Number is entered in the Excel sheet, the system will display the error in the Error Log.
Related Articles
Stock Adjustment Process
Create a New Stock Adjustment Requisition Document Step 1: Initiating the Stock Adjustment Requisition Document. Navigation Path: Parts >> Inventory >> Adjustment >> Stock Adjustment Requisition Open the system and navigate to the "Stock Adjustment ...Excess Stock Reconciliation (ESR)
Purpose: This SOP outlines the steps required to initiate, verify, and save an Excess Stock Reconciliation (ESR) document within the POMS application. The ESR process ensures that any discrepancies in stock levels are addressed and excess stock is ...How to Generate Stock Position As On Report?
Step 1: Access the Report Navigate to the Report: To access the Stock Position As On report, follow the navigation path: Parts > Reports > Inventory > Stock > Stock Position As On. Step 2: Apply Filters Once the report interface opens, you will be ...Stock Transfer Process
Stock Transfer Process Procedure for Stock Transfer Document - Step 1: Initiating the Stock Transfer Requisition Navigation Path: Parts >> Inventory >> Transfer >> Stock Transfer Requisition Open the system and navigate to the "Stock Transfer ...Standard Operating Procedure (SOP) for Stock Transfer Process Lot Wise
1. Navigation Access the Parts Module in the application. Navigate to Inventory and select Stock Transfer. 2. Verify Part Availability Before initiating a stock transfer, check the Part Lot Detail Report to confirm the available quantity of the part ...