Rack & Part Bin Location & Item Branches Process
Purpose :
The purpose of this utility is used for bulk upload as Rack bin location tagging used for bulk bin with rack upload and part bin location tagging used for bulk location details upload based on the procedures outlined in the Standard Operating Procedure (SOP), which ensures accurate data entry, validation, and efficient warehouse management by following the specified steps for both rack bin and part bin location tagging.
1: Rack Bin Location Tagging.
To begin the Rack Bin Location tagging, follow these steps:
Navigate to the Rack Bin Location Utility:
- Path: Administration > Management > Foundation > Rack Bin Location Tagging.
2. Download the Excel Sheet Format:
A. Download the necessary Excel format.
B. Open the downloaded Excel sheet to prepare for data entry.
Rack | Bin | ExternalCode |
Level | F1 | F1 |
Enter the following data in the Excel sheet:
- Rack: The associated rack location name (e.g., Level).
- Bin: The associated bin location (e.g., F1).
- External Code: Same as Bin Code.
3. Update Data According to the Actual Rack & Bin Location:
1. Apply Filter and Import Data:
- Filter by Company, Branch, and Root Location.
- Click on “Import” to upload the updated Excel sheet.
2. Review Location Details & Save:
- Ensure all location details are correctly updated and saved.
Note -
- To check Location details open location utility.
- Users can get rack codes from the utility at all locations
- Can be Transected tick is mandatory to tracking of inventory. ( Please crosscheck whether the transaction mark can be applied in all locations )
2: Part Bin Location Tagging
To begin the Part Bin Location tagging, follow these steps:
Navigate to the Part Bin Location Utility:
- Path: Administration > Management > Foundation > Part Bin Location Tagging.
2. Download the Excel Sheet Format:
- A. Download the necessary Excel format.
B. Open the downloaded Excel sheet to prepare for data entry.
C. Update Data According to Part Bin Location:
ItemCode | Rack | Bin |
P6120810 | LOC-300 | Level-F1 |
Enter the following data in the Excel sheet:
- Item Code: The unique identifier for the part (e.g., P6120810).
- Rack: The associated rack location code (e.g., LOC-300). Get this details from Location Master.
- Bin: The associated bin location with rack name attached (e.g., Level-F1). This is concrete Rack and Bin Details.
3. Apply Filter and Import Data:
- Filter by Company, Branch, and Root Location.
- Click on “Import” to upload the updated Excel sheet.
D. Review Part Bin Location Details & Save:
3: Item Branches Upload
Step 1: Access the Item Branches Upload Utility
- Navigate to the path:
- Path: Administration > Management > Foundation > Item Branches Upload.
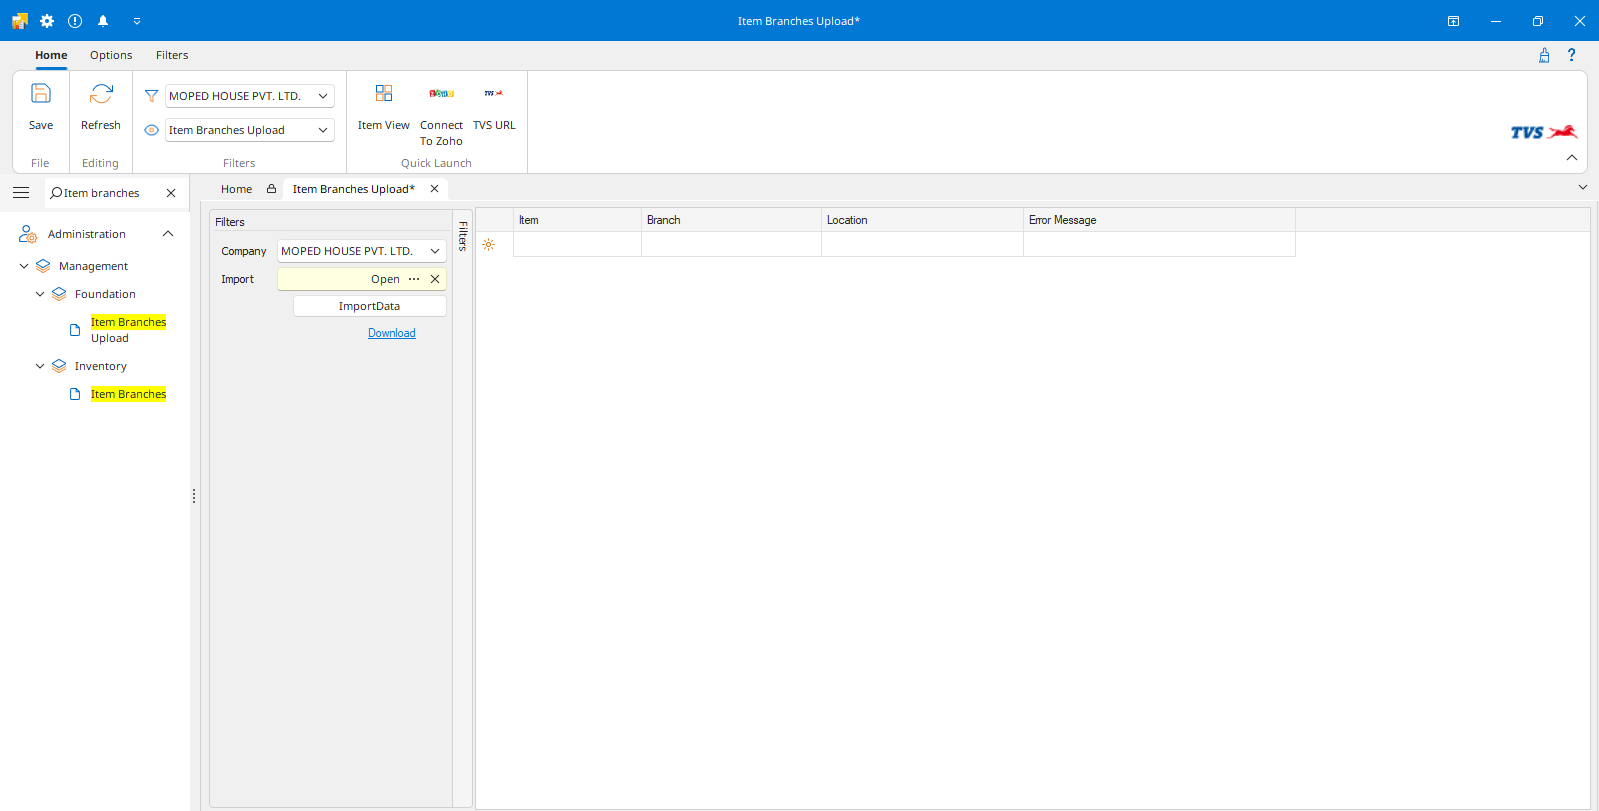
Path: Administration > Management > Foundation > Item Branches Upload.
Step 2: Download the Excel Sheet Format
A. Click to download the necessary Excel format from the utility.
B. Open the downloaded Excel file to prepare for data entry.
C. Update Excel sheet data.
- Then User updates this extracted data into the Item Branches Upload Excel format.
|
ItemCode |
BranchCode |
LocationCode |
|
BR001 |
Level-F1 |
Ensure the sheet includes:
- Item Code: K2010120
- Branch ID: BR001, etc.
- Location ID: Level-F1
3. Apply Filter and Import
-
Apply a filter by Company as needed.
-
Click Import to upload the updated Excel sheet into the system.
4. Review and Save
-
Verify that the Part Bin Location details are correctly reflected.
-
Once reviewed, click Save to finalize the upload.
Validation Check
Validation Check
To ensure data accuracy, conduct a thorough validation check:
Check if the part item name and bin location names are correct:
- Ensure all entries for part numbers and their corresponding locations are accurate.
- Use the location utility to cross-check and verify the details.
If any issues are found, correct the information in the Excel sheet and re-import.
Related Articles
Bin Location Creation
Purpose - The purpose of creating an SOP for part bin locations is to ensure organized storage, improve inventory accuracy, optimize space, enhance efficiency, reduce errors, and maintain safety and compliance in part management. New Bin Location ...Part Lot Detail Report
Step 1: Access the Report Navigate to the Report: To access the Pending GRN report, follow the navigation path: Parts > Reports > Inventory > Stocks > Part Lot Details Report Step 2: Apply Filters Branch - Select the specific branch you want the data ...Partially GRN Process
Purpose - A Partially GRN (Goods Receipt Note) is used when only a portion of the ordered goods has been received. It helps track partial deliveries, manage inventory, and handle payments or invoicing for the received goods while awaiting the rest of ...Stock Transfer Process
Stock Transfer Process Procedure for Stock Transfer Document - Step 1: Initiating the Stock Transfer Requisition Navigation Path: Parts >> Inventory >> Transfer >> Stock Transfer Requisition Open the system and navigate to the "Stock Transfer ...Standard Operating Procedure (SOP) for Stock Transfer Process Lot Wise
1. Navigation Access the Parts Module in the application. Navigate to Inventory and select Stock Transfer. 2. Verify Part Availability Before initiating a stock transfer, check the Part Lot Detail Report to confirm the available quantity of the part ...